【1.カテゴリ新規登録編】Ruby on Rails + ReactでSNSアプリを作る

こんにちは、ミニマリストいずです。
Rail +ReactでSNS機能を持ったWEBアプリの作り方を紹介していく連続企画の第二弾です。
今回はメモのカテゴリ登録ができるようにしていきます。
初学者の方にもわかるようにまとめていきますが、不明点がありましたら、以下から質問していただければと思います。
作成するアプリの機能紹介(再掲)
サンプル動画(再掲)
作成する機能一覧(再掲)
動画でご覧いただくとお分かりになるかと思いますが、以下の機能を本アプリでは実装していきます。
- ユーザ管理機能
- 新規登録
- ログイン
- メモカテゴリ機能
- 作成
- 取得
- 動画内ではクレドと表現されている部分
- メモ機能
- 作成
- 一覧取得
- 詳細取得
- 動画内ではアクションメモと表現されている部分
- コメント機能
- 作成
- 取得
Webアプリの基本であるCRUDを実装しています。
どのアプリを作るにも参考になると思いますので、初学者の方にもおすすめのアプリになっています。
メモカテゴリ登録機能(バックエンド編)
Rails側のメモカテゴリ機能から作成していきます。
メモカテゴリのモデル・DB
まず以下のコマンドで、モデルを追加していきます。
rails g model category以下のように表示されていたらOKです。

次に作成されたマイグレーションファイルの「〇〇_create_categories.rb」を以下のように変更します。
1class CreateCategories < ActiveRecord::Migration[6.1]
2  def change
3    create_table :categories do |t|
4      t.string :name, null: false
5      t.timestamps
6    end
7  end
8endマイグレーションファイルを編集できたら、以下のマイグレーションコマンドを実行し、DBにカラムを追加します。
rails db:migrate以下のように表示されていたらOKです。

バリデーションの設定
モデルファイルのcategory.rbを以下のように変更します。
1class Category < ApplicationRecord
2  validates :name, presence: :true
3endここまで出来たらDBに登録できるかを試しにコマンドで実行してみます。
まず以下のコマンドを実行します。
rails cCategory.create(name: "test1")その後、以下のコマンドで、DBに問題なくデータが保存できているかを確認します。
Category.find_by(name: "test1")以下のように表示されていたらOKです。

念の為、今回登録したデータは以下のコマンドで削除しておきます。
Category.find_by(name: "test1").deleteもう一度データを確認し、以下のように「nil」と表示されればOKです。

ここまででモデルの準備、確認は完了です。
以下のように「exit」と入力し、rails cの状態を抜けましょう。

次にコントローラーを用意していきます。
メモカテゴリのコントローラー
次に以下のコマンドで、コントローラーを追加していきます。
rails g controller categories次に、以下画像のように「controllers>api>v1>categories_controller.rb」となるように変更してください。

新規の保存をできるようにしたいので、「app/controllers/api/v1/categories_controller.rb」に以下のように書き換えます。
1class Api::V1::CategoriesController < ApplicationController
2  def create
3    category = Category.new(category_params)
4    if category.save
5      render json: category, status: :created
6    else
7      render json: category.errors, status: :unprocessable_entity
8    end
9  end
10
11  private
12
13  def category_params
14    params.require(:category).permit(:name)
15  end
16end
17
次に、ルーティングを設定していきます。
メモカテゴリのルーティング
config/routes.rbを以下のように書き換えます。
1Rails.application.routes.draw do
2  namespace :api do
3    namespace :v1 do
4      resources :categories, only: [:create]
5    end
6  end
7end
8
ここまでできたら、データを保存するリクエストをコマンドで飛ばしてみて、データ登録までできるか確認します。
curlコマンドで登録できるか確認
先にリクエストを受け付けられるように、rails sコマンドで、サーバーを起動します。
rails sサーバーが起動したら、以下のコマンドでリクエストを飛ばします。
curl -X POST -H "Content-Type: application/json" -d '{"category": {"name": "test2"}}' http://localhost:3010/api/v1/catogiresrails cを実行した後、以下のようなコマンドで、データが登録できていることが確認できたらOKです。

データが登録できることを確認したら、rails c はexitで終了しておきましょう。
corsのインストール・準備
reactの実装を進める前にreactとの通信ができるように、corsライブラリをインストールしていきます。
以下のようにGemfileのrack-corsのコメントアウトを外します。
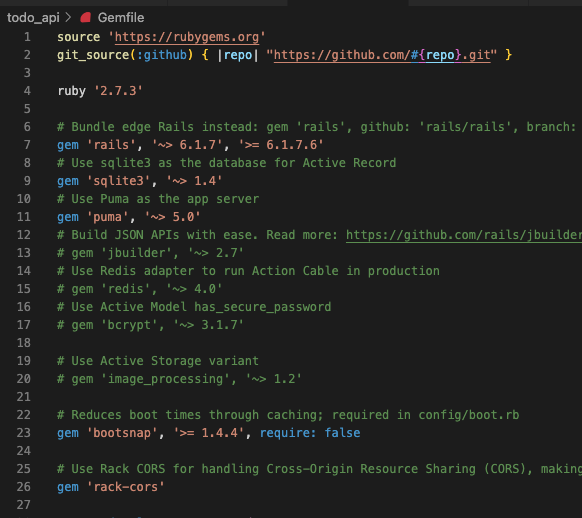
bundle installを実行します。
bundle installcors.rbをreactからの通信を許可できるように変更します。
1Rails.application.config.middleware.insert_before 0, Rack::Cors do
2  allow do
3    origins 'http://localhost:3000'
4
5    resource '*',
6        headers: :any,
7        expose: ["access-token", "uid", "client"],
8        methods: [:get, :post, :put, :patch, :delete, :options, :head],
9        credentials: true
10  end
11endメモカテゴリ登録機能(フロントエンド編)
見た目の作り方、先ほど用意したRails APIへのリクエストの出し方などそれぞれ説明していきます。
必要なライブラリのインストール
Axiosのインストール
以下のコマンドで、axiosをインストールします。
yarn add axiosターミナルの表示が変わらなくなったら、package.jsonを確認し、以下のように追加されていたらOKです。
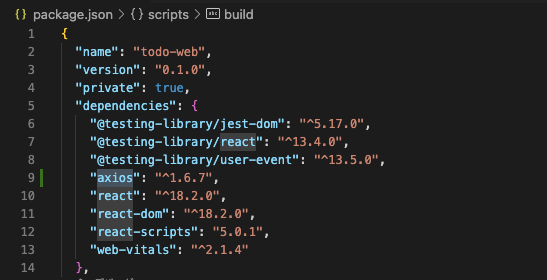
react-router-domのインストール
以下のコマンドでreact-router-domをインストールします。
yarn add react-router-domこちらも先ほどと同様にpackage.jsonを確認し、react-router-domが追記されていたらOKです。
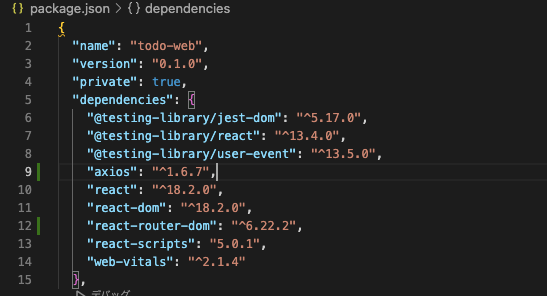
chakra-uiのインストール
以下のコマンドで、chakra-uiをインストールします。
yarn add @chakra-ui/react @emotion/react @emotion/styled framer-motionこちらもpackage.jsonをインストールし、chkara-ui関係ライブラリがインストールされているか確認します。
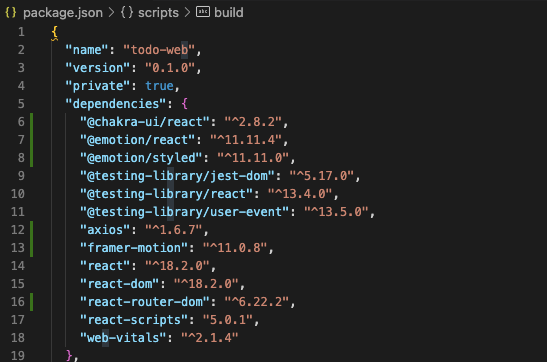
また、chakra-uiを使えるようにするには、index.jsを以下のように変更する必要があります。
1import React from 'react';
2import ReactDOM from 'react-dom/client';
3import './index.css';
4import App from './App';
5import reportWebVitals from './reportWebVitals';
6import { ChakraProvider } from "@chakra-ui/react";
7
8const root = ReactDOM.createRoot(document.getElementById('root'));
9root.render(
10  <React.StrictMode>
11    <ChakraProvider>
12      <App />
13    </ChakraProvider>
14  </React.StrictMode>
15);
16
17// If you want to start measuring performance in your app, pass a function
18// to log results (for example: reportWebVitals(console.log))
19// or send to an analytics endpoint. Learn more: https://bit.ly/CRA-vitals
20reportWebVitals();
21

ここでようやく本当に事前準備は完了です。
前回から引き続きたくさんインストールをしてきましたので、エラーが出る方は、前の記事に戻って確認もしてみましょう。

もし解決できない場合は、以下からお申込みいただければ無料質問対応もいたします。
メモカテゴリの登録ページを作成
必要なフォルダ、ファイルを作成
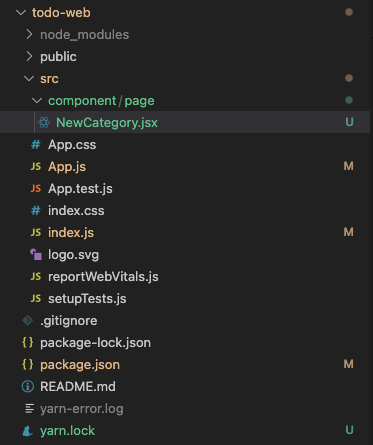
srcフォルダの下にcomponentフォルダ、componentフォルダの下にpageフォルダを作成します。
さらにpageフォルダの下に、NewCategory.jsxファイルを作成します。
メモカテゴリ作成ページの表示確認
まず、カテゴリ作成ページを表示できるようにルーティングを整え、表示の確認から進めます。
App.jsを以下のように書き換えましょう。
1import { BrowserRouter, Routes, Route } from "react-router-dom";
2import NewCategory from "./component/page/NewCategory";
3
4function App() {
5  return (
6    <BrowserRouter>
7      <Routes>
8        <Route path={`/category/new`} element={<NewCategory />} />
9      </Routes>
10    </BrowserRouter>
11  );
12}
13
14export default App;
15
次に、NewCategory.jsxを表示確認ように変更します。
1export default function NewCategory() {
2 return (
3  "NewCategory"
4  );
5}
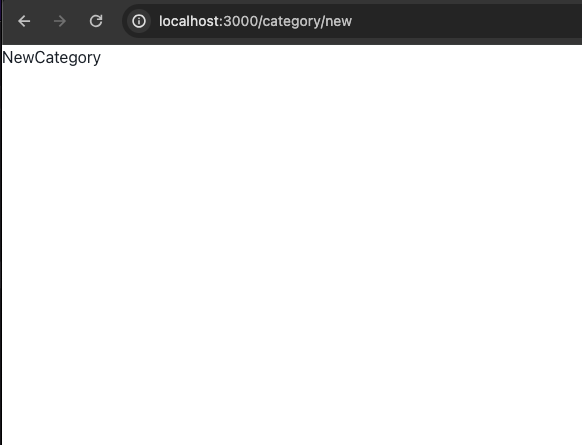
yarn startとコマンドを実行し、サーバーを起動します。
yarn start以下のように表示されたらルーティングの設定はOKです。URLが「localhost:3000/category/new」であることに注意してください。
メモカテゴリを登録できるようにコーディング
ここからが本番ですね。NewCategory.jsxを以下のように書き換え、メモカテゴリのリクエストを出せるようにします。
1import React, { useState } from 'react';
2import {
3  Box,
4  Input,
5  Button,
6  Center,
7} from "@chakra-ui/react";
8import { useToast } from "@chakra-ui/react";
9import axios from 'axios';
10
11export default function NewCategory() {
12  const [category, setCategory] = useState('');
13  const [isLoading, setIsLoading] = useState(false);
14  const toast = useToast();
15
16  async function fetchCreateCategory() {
17    setIsLoading(true);
18
19    try {
20      if (!category) {
21        toast({
22          title: 'カテゴリを入力して下さい。',
23          status: 'error',
24          isClosable: true,
25        });
26
27        return;
28      }
29
30      const res = await axios.post("http://localhost:3010/api/v1/categories", {
31        category: {
32          name: category,
33        },
34      });
35
36      if (!res.status || (res.status < 200 && res.status >= 300)) {
37        throw new Error(`HTTP error! status: ${res.status}`);
38      }
39
40      toast({
41        title: 'カテゴリを登録しました。',
42        status: 'success',
43        isClosable: true,
44      });
45    }
46    catch (error) {
47      console.error('Error creating credos:', error);
48      toast({
49        title: 'カテゴリの登録に失敗しました。',
50        status: 'error',
51        isClosable: true,
52      });
53    }
54    finally {
55      setIsLoading(false);
56      setCategory('');
57    }
58  }
59
60  return (
61    <Center>
62      <Box w={["100%", "90%", "80%", "70%", "60%"]} mt={["50px", "100px", "150px", "200px"]}>
63          <Input
64            value={category}
65            onChange={(e) => setCategory(e.target.value)}
66            placeholder="追加したいカテゴリを入力" />
67        <Center>
68          <Button mt="6px" onClick={fetchCreateCategory} isLoading={isLoading}>登録</Button>
69        </Center>
70      </Box>
71    </Center>
72  );
73}
コーディングできたら以下のコマンドで、Railsのサーバーも立ち上げます。
rails s以下のように動作になっていたらOKです。
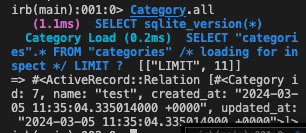
データが登録できているかを確認するためにrails cコマンドでコンソールを立ち上げ、Category.allで確認してみましょう。
もっと解説を聞きたい!質問したい!という方は、以下から無料質問をしてみてください。
まとめ
SNSアプリを作成していくにあたり、RailsとReactを連携し、メモのカテゴリを登録できるようになりました。
次回はメモを登録できるようにしていきます。


